Dryer vents aren’t built to handle years of lint buildup, but that’s exactly what happens in many homes. The problem isn’t just the lint you pull from the trap; it’s the debris that escapes into the vent system and collects over time, layer by layer, until airflow slows to a crawl. When that happens, heat and moisture get trapped inside, and the dryer has to work harder just to do its job.
In this guide, you’ll learn how to clean a clogged dryer vent step by step and how to keep it maintained so the problem doesn’t return.
Step-by-Step Guide to Cleaning a Clogged Dryer Vent
Dryer vent cleaning is more than just a quick vacuum job. To do it properly — and safely — you need to go beyond the lint trap and get into the vent system itself. When done right, this not only restores performance but also reduces energy usage and eliminates a major fire risk. Below is a step-by-step breakdown that covers every part of the process, from disconnecting the unit to cleaning deep inside the ductwork.
Unplug the Dryer and Disconnect the Vent
The first step in any appliance maintenance task is to make it safe to work on. Dryers, especially electric ones, use a high-voltage connection that should never be handled while the machine is live. Gas dryers add another layer of risk if the line is left open or shifted without care.Here’s how to start the right way:
- Unplug the dryer from the wall socket. This cuts power and reduces any electrical risk during the cleaning process.
- If you’re working with a gas dryer, turn off the gas supply valve. It’s usually located behind the dryer or along the wall. This prevents any leaks in case the gas line gets moved or loosened while you work.
- Slowly move the dryer away from the wall, leaving enough space to comfortably access the vent hose behind it. This may require tilting it slightly or walking it out if it’s heavy.
- Behind the dryer, you’ll see a vent hose or rigid duct that connects to the wall. Most homes use flexible foil or semi-rigid metal ducts.
- Loosen the hose clamp — either by turning the screw with a flathead screwdriver or squeezing the spring clamp by hand. Carefully slide the hose off the back of the dryer.
- Do the same at the wall connection if needed, especially if you plan to clean from both ends.
At this point, you should be able to see any large lint clumps or dust buildup in the openings. Don’t worry if it looks bad — that’s exactly why you’re doing this.
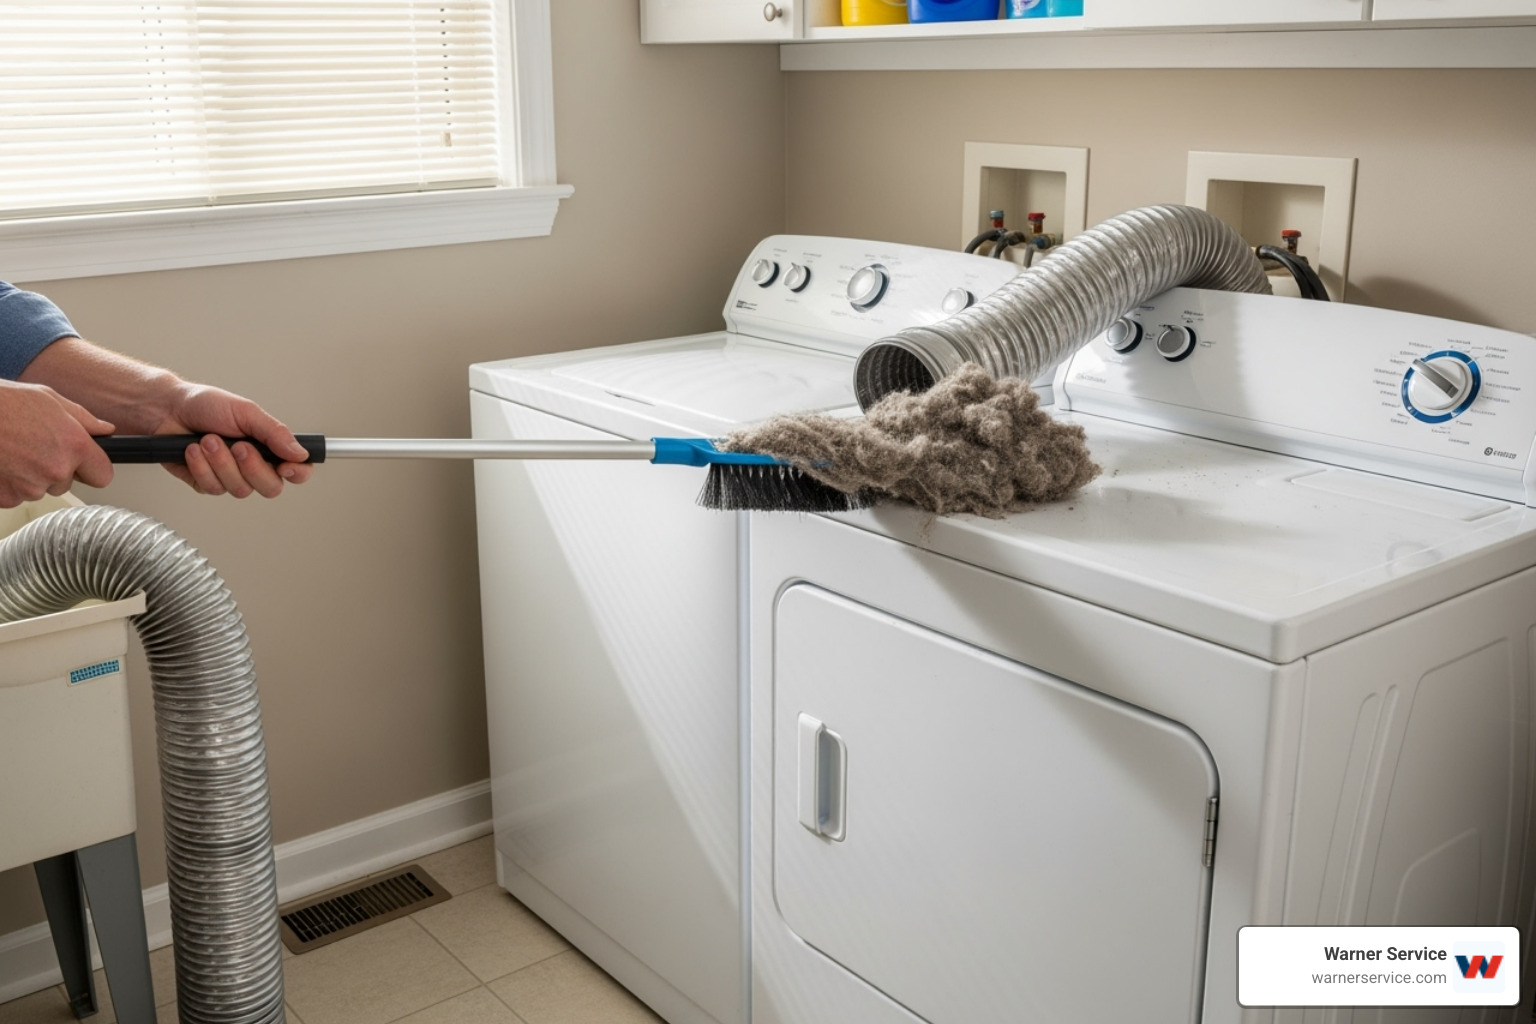
Clean the Lint Trap and Inside the Dryer Housing
Even if you clean the lint screen after every load, lint still makes its way past it and into the dryer’s internal housing. This area is often overlooked, but it’s a common spot for hidden clogs — and it’s close to the heating element, which makes it a fire risk if not cleaned. Here’s how to clean it thoroughly:
- Remove the lint screen and set it aside.
- Use a vacuum with a narrow hose attachment to reach deep into the slot where the screen fits. Move it around to grab as much debris as possible.
- If you have a dryer vent brush kit, use the brush to loosen anything stuck to the interior walls of the lint trap housing. Rotate the brush gently as you feed it in.
- Some dryers allow you to remove the top panel (secured by a few screws) for better access to the area under the lint trap. Only do this if you’re comfortable working around appliance parts.
- Once loosened, vacuum the lint again to remove what the brush stirred up.
This step is often where people find large amounts of compacted lint, especially if the vent hasn’t been cleaned in years. Removing this reduces the risk of overheating and ensures that future airflow isn’t restricted from inside the unit.
Read More : How Dryer Vent Cleaning Can Help Prevent Carbon Monoxide Build-Up
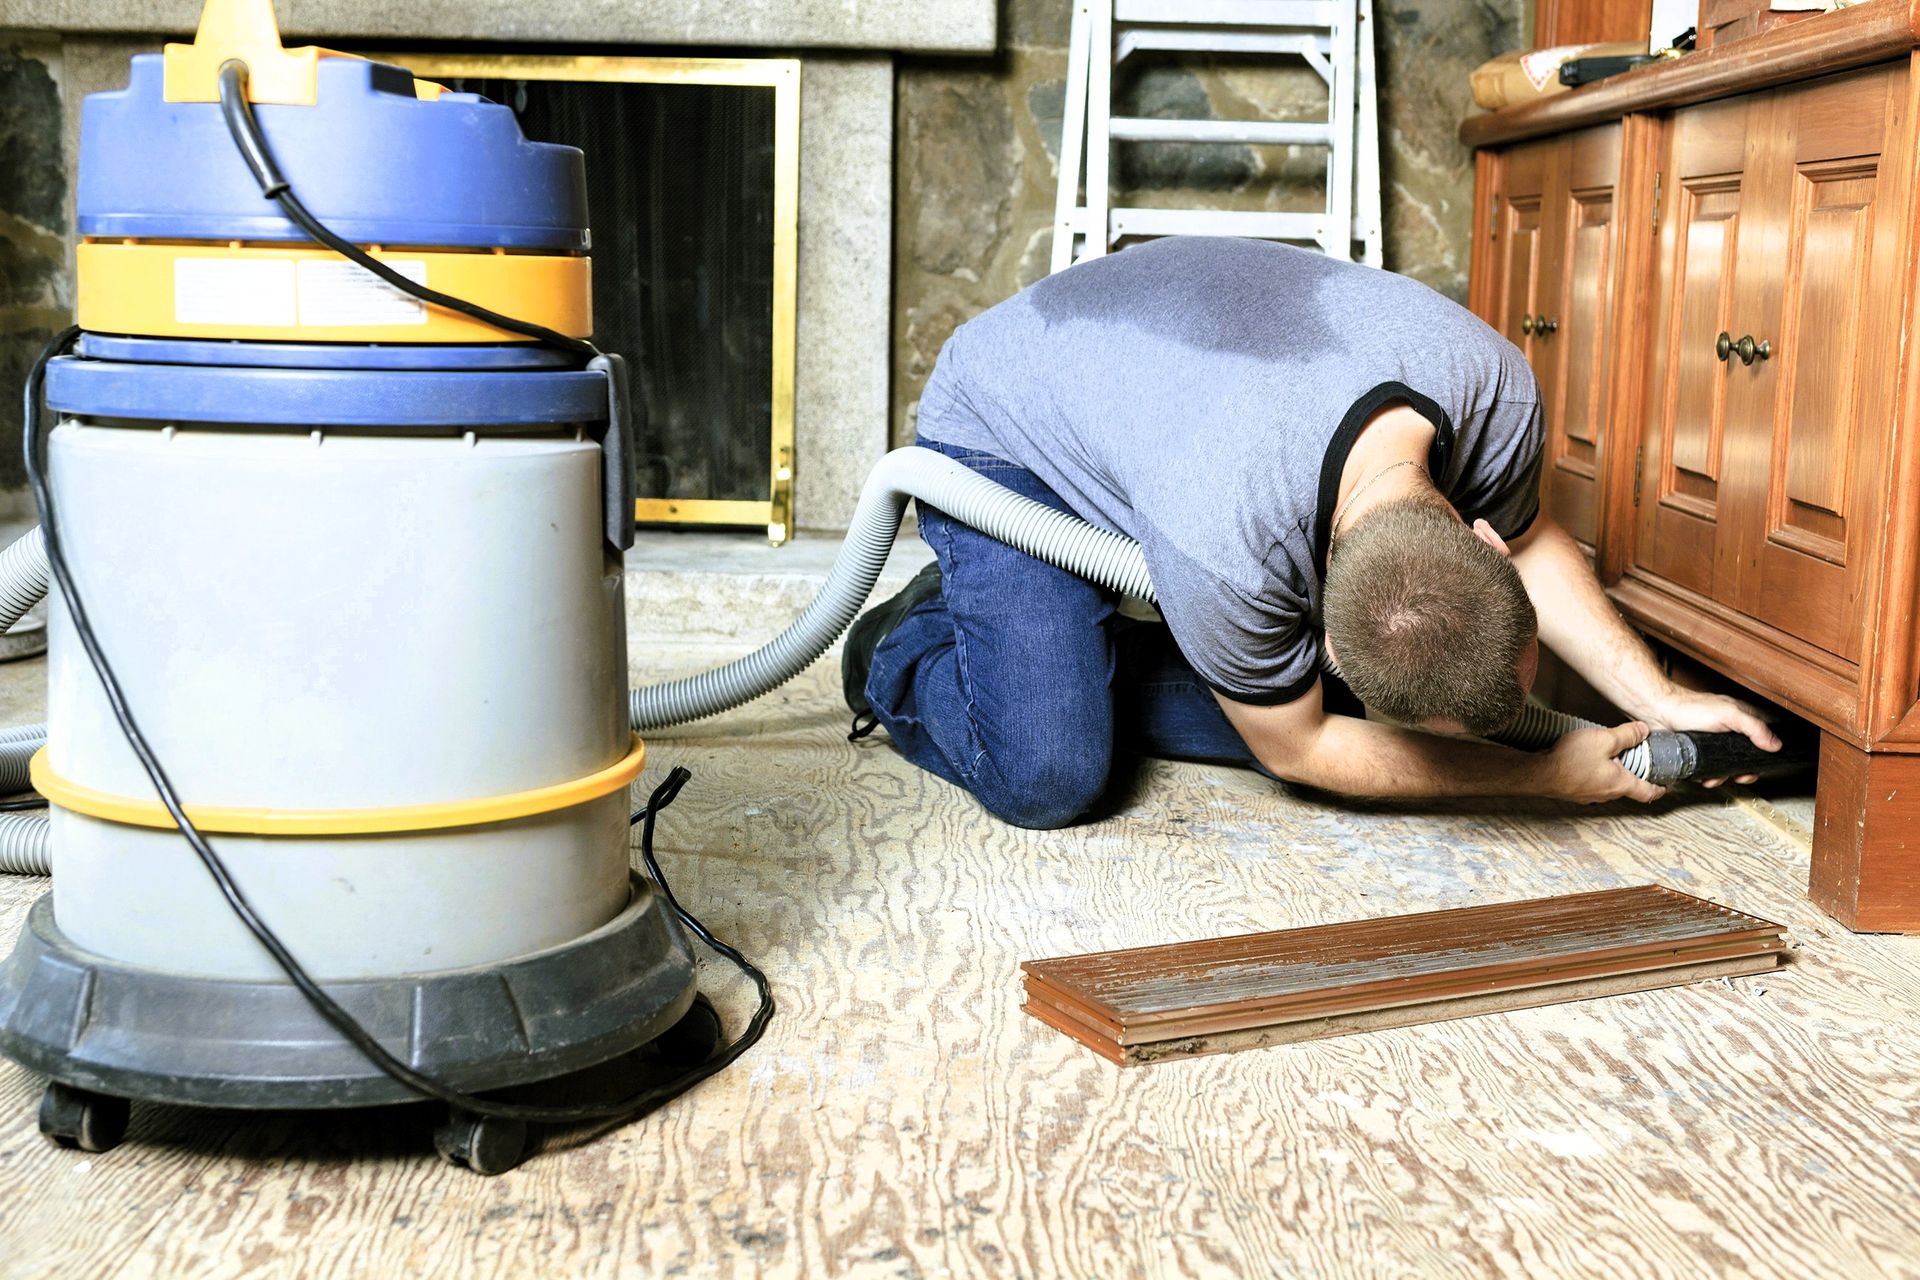
Clean the Vent Hose and the Wall Duct
This is where the majority of the problem lives — inside the vent system that carries air from the dryer to the outside. This duct can run anywhere from a few feet to over 20 feet long, depending on your home’s layout. Over time, lint, dust, and even small objects get stuck along the walls and block airflow. To clean it properly:
- Shake out the vent hose outside if it’s short and flexible. You may be able to knock out loose lint just by tapping it.
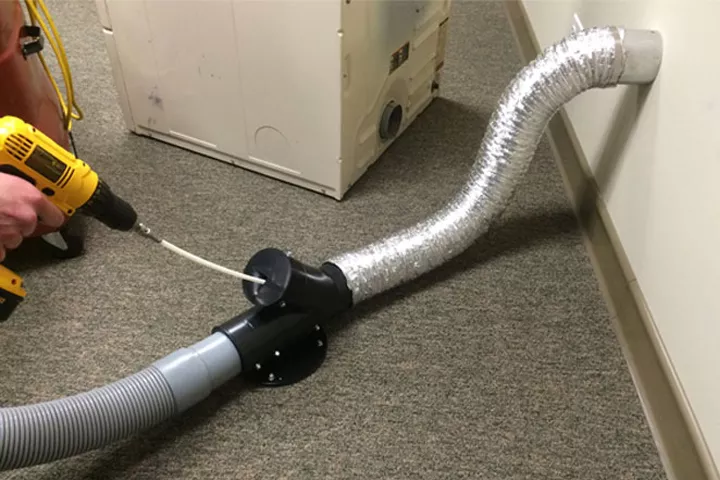
- For a deeper clean, use a dryer vent brush kit. These kits usually come with flexible plastic or metal rods and a round bristle brush that attaches to the end.
- Attach the brush to a cordless drill if your kit allows. Start feeding the brush into the duct that leads into the wall, spinning it slowly to dislodge any lint stuck to the walls.
- Push the brush as far as it will go. If the duct turns sharply or is very long, you may need to clean it from both ends — inside and out.
- As you brush, pause periodically to vacuum out the loosened lint at the opening. You don’t want all of it getting pushed further into the system.
- Once done, repeat the process in the opposite direction if you were able to disconnect the exterior vent.
You might be surprised by how much debris you pull out during residential dryer vent cleaning. Some homeowners report removing several cups of compacted lint — more than enough to block airflow and create a fire hazard.
Clean the Exterior Vent Outlet
The vent cap outside your home is where warm, moist air is expelled. It’s also the final stop for lint, and it can easily become clogged or blocked, especially if the flap is stuck or the vent is screened off. In some cases, birds or small animals even build nests inside the outlet if it hasn’t been cleaned for a while. What to do:
- Locate the exterior vent — usually on the side of the house or near the ground.
- Remove the cover if needed (some snap off, others are held by screws).
- Inspect the vent outlet for visible clogs, compacted lint, or debris like leaves or nesting materials.
- Use a brush or vacuum to clear the vent cap and the pipe behind it. A shop vac works well here if you have one.
- Make sure the flap or damper opens freely. If it’s stuck or cracked, consider replacing it. Restricted airflow at this point will continue to cause problems inside the duct.
Once cleaned, go back inside and run the dryer for a minute to test airflow. Strong, warm air should be coming out of the vent without resistance.
Reconnect the Vent and Test the System
Now that everything is clean, it’s time to reconnect your dryer and make sure the venting system works as it should.Final steps:
- Reattach the vent hose to the back of the dryer and secure it with the clamp. Make sure the connection is tight, but don’t crush the hose.
- Do the same at the wall connection if you removed it earlier.
- Gently push the dryer back into place, leaving just enough space so the vent hose doesn’t kink or get smashed against the wall.
- Plug the dryer back in or turn on the gas valve.
- Run the dryer on a high heat cycle for 5–10 minutes. Go outside and check that warm air is blowing out of the vent cap smoothly.
- Listen for any unusual sounds from the dryer or signs of poor performance.
If airflow is strong and the dryer sounds normal, the clog is gone and your vent is working as it should.
How to Maintain a Clean Dryer Vent and Prevent Future Clogs
Once your dryer vent is cleared out, the next challenge is making sure it stays that way. Lint, dust, and moisture will always be present when you dry clothes — and if regular maintenance is skipped, the vent can begin to clog again within weeks. But with the right habits in place, you can dramatically slow down buildup and keep your dryer operating efficiently and safely.
Here are the most effective ways to maintain a clean dryer vent over time:
Deep-Clean the Lint Trap Housing Every Few Weeks
The lint screen catches most debris, but it doesn’t stop everything. Beneath it, the housing where the screen fits begins to collect fine particles of lint and dust — often out of sight and out of mind. As this material builds up, it gets drawn into the ductwork, feeding new clogs even after a full cleaning.
To prevent this, unplug the dryer and use a vacuum or long brush to gently clean inside the lint trap housing every few weeks. Rotate the tool slowly to break up buildup, then vacuum again to remove any dislodged debris. This small step keeps airflow strong and slows down the return of lint into the vent system.
Keep the Area Around the Dryer Clear of Clutter and Dust
Clutter around the dryer — whether it’s laundry baskets, stored items, or even hanging clothes — can block ventilation and stir up extra dust. That airborne lint and debris often finds its way right back into the vent, undoing your cleaning efforts little by little.
To stay ahead of this, keep the area around the dryer open and clear. Avoid storing anything behind the unit or on top of it. Sweep or vacuum the floor, corners, and baseboards regularly to keep the space dust-free. A clean, uncluttered laundry area supports better airflow and reduces how much dust re-enters the system.
Watch for Heat Warnings and Musty Odors
If you notice the dryer running hot, giving off a burnt smell, or leaving clothes damp, those are early warning signs that airflow is getting restricted again. Even if you’ve recently cleaned the vent, these symptoms often mean lint is building up in one of the key areas — either inside the housing, hose, or wall duct.
Don’t ignore these signals. Take a moment to stop the machine, inspect the vent connections, and clean around the trap and hose if needed. Acting on small issues early helps you prevent major clogs from forming again and keeps your system running safely.
Use Only Approved Dryer Sheets and Avoid Overdrying
Not all dryer sheets are safe for long-term use. Many leave behind a film that coats the lint screen and vent interior, making it easier for lint to stick and harder for air to move. That buildup slows performance and increases how often you’ll need to clean the system again.
To avoid this, use dryer sheets only when needed, and opt for low-residue options when possible. Wash the lint screen with warm water and dish soap every few weeks to clear any film. Also, avoid over-drying clothes — longer drying times produce more lint and wear out both the dryer and your venting system faster.
Do a Monthly Exterior Vent Inspection
The exterior vent is the final exit point for air and moisture, and it often becomes a hidden trap for lint. Rain, wind, and nearby vegetation can also lead to debris buildup that restricts airflow or jams the flap shut. Even a freshly cleaned vent can start clogging again here if the outlet isn’t checked regularly.
Make a habit of walking outside while the dryer is running once a month. Feel the airflow — it should be strong and steady. If the flap barely opens or seems stuck, remove any lint or dust around the outlet and make sure it moves freely. Maintaining this vent keeps pressure low and airflow consistent through the entire system.
Read More: 8 Signs You Need to Clean Your Dryer Vent
Check the Condition of the Duct Hose Every Two Months
A clean vent system won’t stay that way if the duct hose behind your dryer is bent, torn, or sagging. Weak or damaged sections cause lint to settle faster, increase air resistance, and sometimes allow hot air to leak into the room, which is both unsafe and inefficient.
Every two months, pull the dryer forward and inspect the full length of the duct hose. Look for crushed spots, loose clamps, or pinholes along the sides. If the material feels soft or flimsy, consider switching to a semi-rigid or rigid metal duct, which handles heat better and resists lint buildup more effectively.
Keep a Simple Maintenance Log
Dryer vent maintenance isn’t something you think about every day — and that’s exactly why it’s easy to forget. A basic log helps you stay consistent by recording the dates of your last cleaning, inspection, or vent check.
You don’t need anything fancy. A note on your calendar, a whiteboard in the laundry room, or a reminder in your phone is enough. Logging even simple tasks like vacuuming the lint housing or checking the hose helps you spot patterns, track performance, and avoid going too long between maintenance cycles.
Still Unsure How to Clean a Clogged Dryer Vent Safely?
Dryer vents aren’t always easy to clean, especially when bends, long duct runs, or older systems are involved. If you’re unsure whether the job was done right or don’t feel safe handling it yourself, Delta Clean Air can help. Our technicians are trained, experienced, and committed to handling every job with care, precision, and safety in mind. We use professional equipment to remove deep buildup, restore airflow, and give you peace of mind.
Schedule your service today and protect your home with expert care you can rely on.